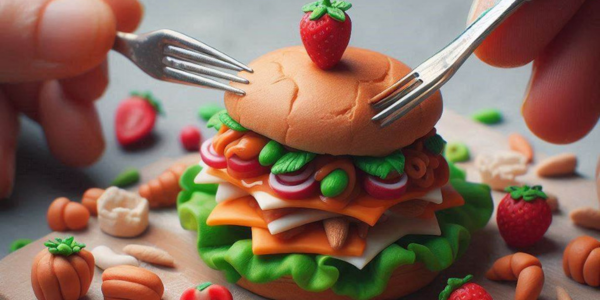
Ever seen pictures of food so small it looks like it could fit on your fingertip, but looks real enough to eat? That’s the magic of miniature food sculpting! It’s like taking your favourite dishes and shrinking them down to a super cute, tiny size.
Why Make Mini Food?
There are tons of reasons why miniature food sculpting is so cool:
- Be a Mini Master Chef: You get to use your imagination and create tiny versions of your favourite foods, or even invent brand new ones!
- Chill Out with Clay: Making mini food can be super relaxing. It’s like a mini-vacation for your mind, letting you focus on something fun and creative.
- Level Up Your Skills: Working with tiny clay lets you practice your sculpting skills and get better at making cool shapes and details.
- Tiny Decorations, Big Fun: Mini food makes the perfect decoration for your room! Imagine a miniature kitchen with all your favourite tiny dishes!
- The Perfect Present: Surprise your friends and family with a mini version of their favourite food – it’s a gift that’s both cute and unique!
Your Mini Food Toolkit: What You’ll Need
Before you start shrinking down your favourite dishes, you’ll need a few supplies:
- Playful Clay: This special kind of clay comes in all sorts of colors and hardens when you bake it. Popular brands are Sculpey, Fimo, and Premo.
- Sculpting Tools: These cool tools help you shape and add details to your mini food. They come in different shapes and sizes, kind of like a mini toolbox!
- Sharp Craft Blade: Think of this like a tiny saw for your clay. It helps you cut and shape it precisely.
- Toothpick Pals: These little guys can be used for all sorts of things, like making tiny holes or holding your creation while you bake it.
- Texture Tools: Want your mini pizza to have a bumpy crust? These tools help you add realistic textures to your food.
- Rainbow Paints: Paint lets you add all the yummy colors to your mini food, making it look super realistic.
- Shiny Shield (Optional): A coat of clear varnish can make your mini food shine and protect it from dust.
Let’s Get Sculpting!
Now that you have all your supplies, it’s time to make your first piece of mini food! Here’s a step-by-step guide:
- Pick Your Mini Meal: Start with something simple like a cupcake or a slice of pizza. This way, you can focus on learning how to sculpt without getting overwhelmed.
- Soften Up Your Clay: Most clay needs a little warm-up before you can use it. This makes it softer and easier to work with, kind of like stretching before playing sports!
- Shape It Up: Start by making the basic shape of your chosen food. Think about the overall form – is it round like a cupcake or long like a slice of pizza?
- Tiny Details, Big Impact: Once you have the main shape, use your tools to add the little details that make your food special.
- Texture Time! Now comes the fun part: adding texture! Use your tools or even things from around the house to make your mini food look real. For example, a toothbrush can make a grainy texture for bread.
Beyond the Basics: Explore More!
As you get more comfortable with miniature food sculpting, you can try new things:
- Go Beyond Baking: There are other types of clay that air dry instead of needing an oven. This can be a quicker way to make mini food.
- Unconventional Materials: Ever thought of making mini food from recycled materials like cardboard or fabric? The possibilities are endless!
- Painting Power: Learn fun techniques to paint your mini food and make it look super realistic and mouthwatering!
Miniature food sculpting is a fun and creative hobby that anyone can enjoy. With a little practice and imagination, you’ll be a mini food master in no time! So grab your clay, unleash your creativity, and get ready to shrink down your favorite dishes into bite-sized masterpieces!
